Accept Bitcoin payments by connecting ConvesioPay with BTCPay Server. This guide shows you how to open the BTCPay integration, access your BTCPay Server, and run a quick test payment.
Before you start
- A ConvesioPay account with access to manage integrations
- Your BTCPay login details
- Access to a Bitcoin wallet (hardware wallet, wallet file, or an extended public key)
You will need:
ConvesioPay deploys and hosts the BTCPay Server on our infrastructure. You still need BTCPay login access to finish setup and manage your store settings (for example, connecting your wallet).
Step 1: Open the BTCPay integration in ConvesioPay
- Log in to ConvesioPay.
- Go to Integrations.
- Find BTCPay Server, then open it.
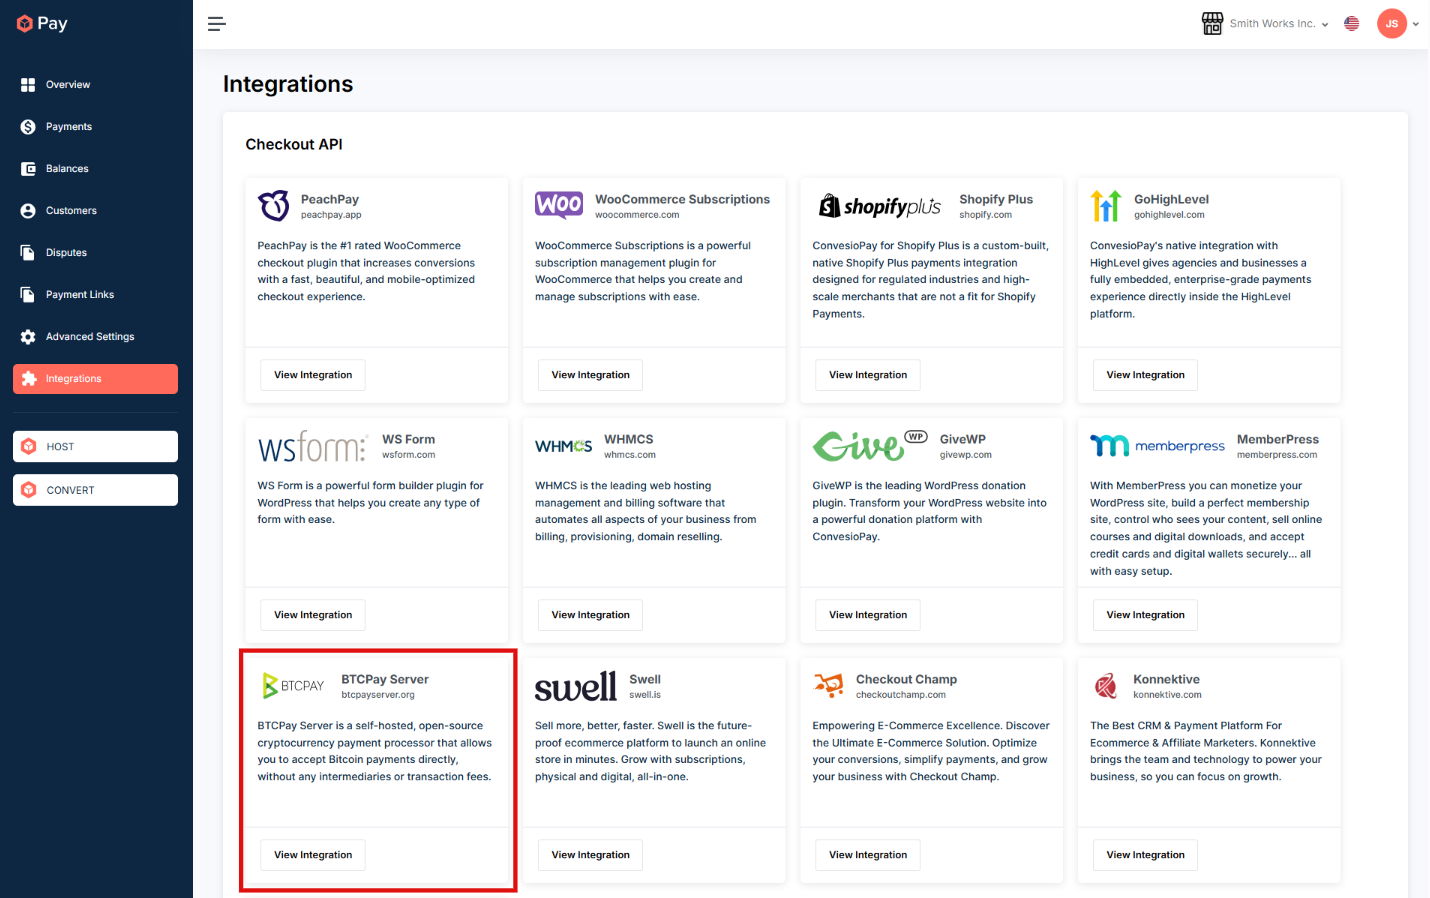
You can also view available integrations here: https://convesio.com/pay/integrations
Step 2: Open your BTCPay Server and sign in
- On the BTCPay Server Integration page, click OPEN BTCPAY SERVER.
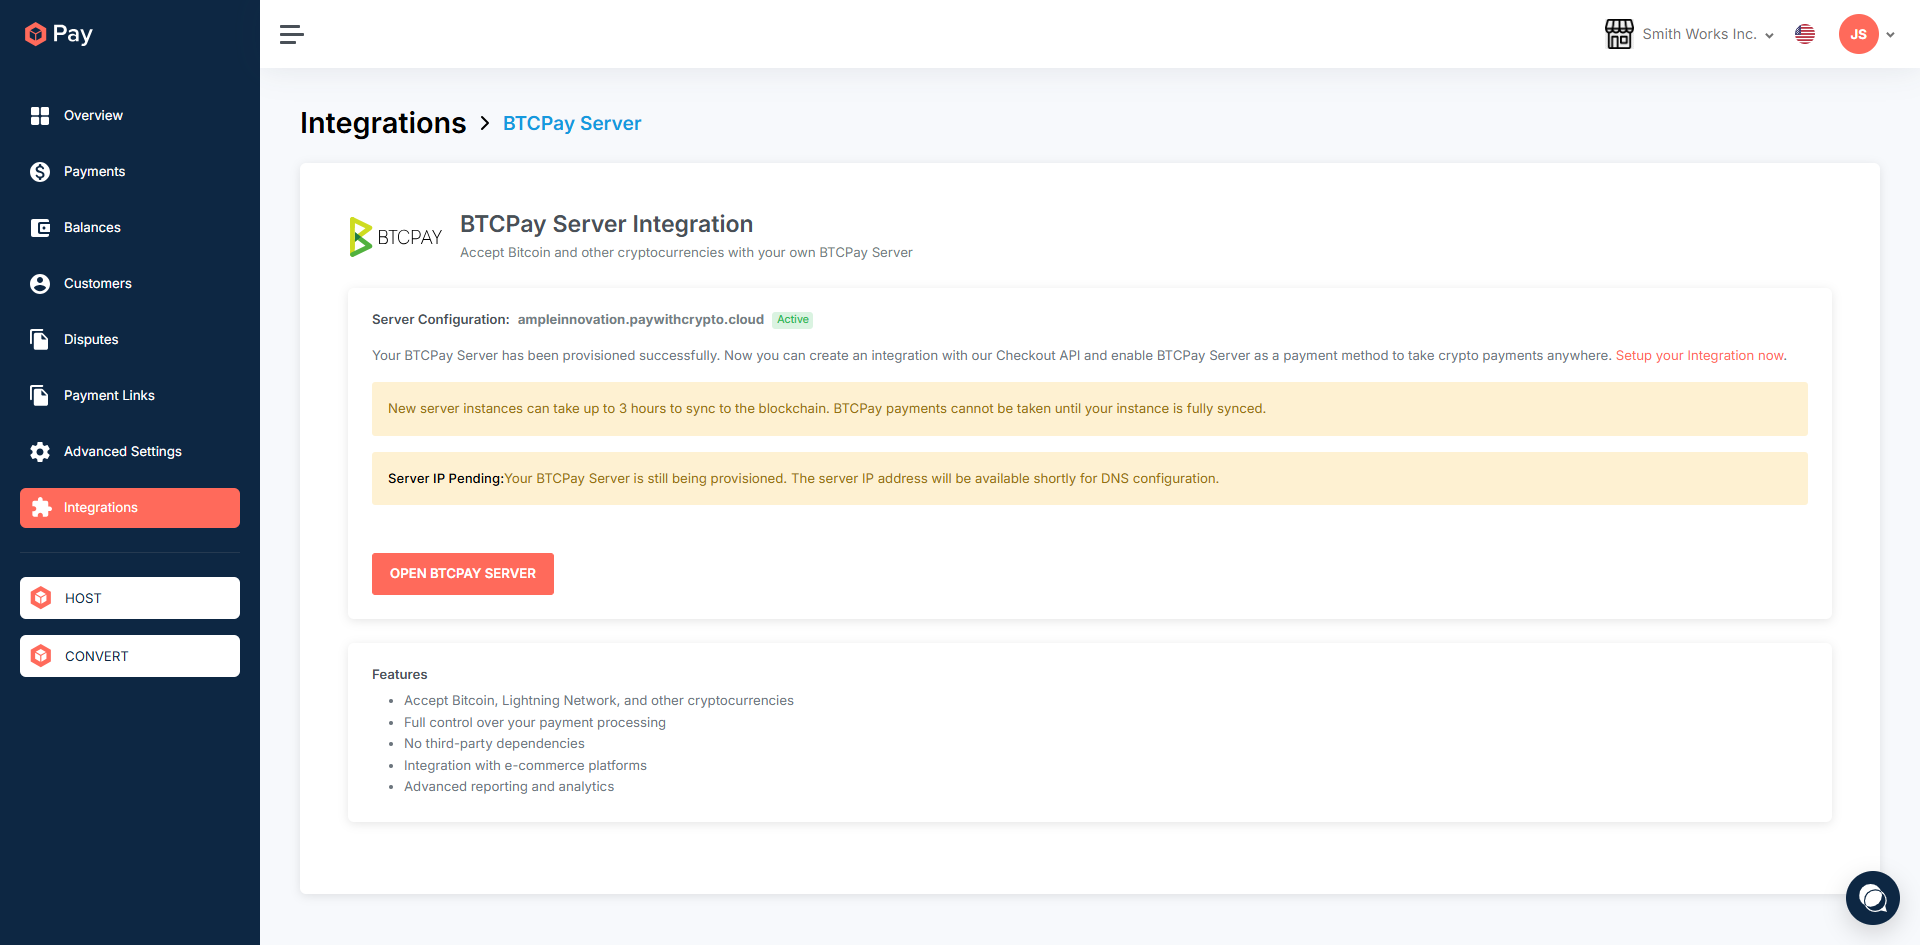
- This will open the BTCPay Server login screen in a new tab. If you need it, you can also use this link: https://ampleinnovation.paywithcrypto.cloud/login?ReturnUrl=%2F
- Sign in with your BTCPay email and password.
.png)
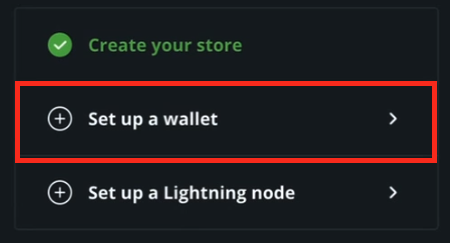
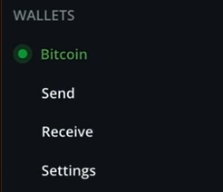
Step 3: Connect a wallet in BTCPay (required)
After signing in to BTCPay, you must connect a wallet to your store. You cannot accept payments until a wallet is connected.
- In BTCPay, open your store and go to the wallet setup for Bitcoin.
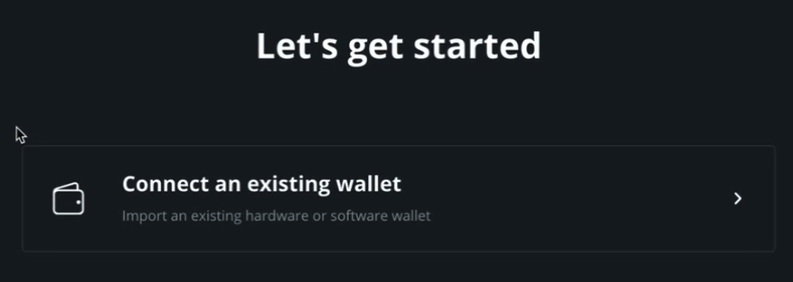
- Choose one of the available options to connect your wallet, for example:
- Connect a hardware wallet
- Choose a method to import a wallet
- Connect a hardware wallet
- Follow the prompts to finish connecting the wallet.
- Confirm Bitcoin shows as ready/active for your store.

Note: If you skip this step, payments cannot be accepted because BTCPay has no wallet to receive funds.
Step 4: Enable Bitcoin as a payment option
Make sure you completed Step 3 (Connect a wallet) first, otherwise Bitcoin payments will not work.
After BTCPay is connected, make sure Bitcoin is enabled wherever you take payments (for example, your checkout or payment settings in ConvesioPay).
If you do not see a Bitcoin option right away, refresh the page and confirm the integration shows as connected.
Test a payment (recommended)
Before going live, run a quick test to confirm everything is working.
- Create a small test order.
- At checkout, choose the Bitcoin / BTCPay payment option (wording may vary).
- Complete the payment.
- Confirm ConvesioPay updates the order/payment status.
Note: Bitcoin payments can take a few minutes to confirm, depending on network activity.
Troubleshooting
BTCPay does not show as connected
- Re-open the BTCPay integration and try connecting again.
- Confirm you have permission to manage integrations in ConvesioPay.
You can’t sign in to BTCPay
- Double-check you are using the correct BTCPay login.
- Use the Forgot password? link on the sign-in screen.
Payments do not update right away
- Wait a few minutes and check again (Bitcoin payments can take time).
- Confirm the payment was completed and not abandoned or expired.
Payments fail or you can’t accept Bitcoin payments
- Confirm your BTCPay store has a wallet connected for Bitcoin.
- If no wallet is connected yet, complete Step 3: Connect a wallet in BTCPay (required).
How to disconnect BTCPay
- In ConvesioPay, go to Integrations > BTCPay.
- Click Disable (or Disconnect).
- Confirm the Bitcoin payment option is no longer shown in checkout.
If you no longer plan to use BTCPay, you can also remove or disable the connection from your BTCPay Server.