Integration Setup Guide: CheckoutChamp/Konnective with ConvesioPay
Introduction
This guide provides clear, step-by-step instructions to integrate CheckoutChamp or Konnective with ConvesioPay. By following the outlined steps, you will be able to connect and configure your systems for seamless payment processing. This guide is suitable for users of all experience levels.
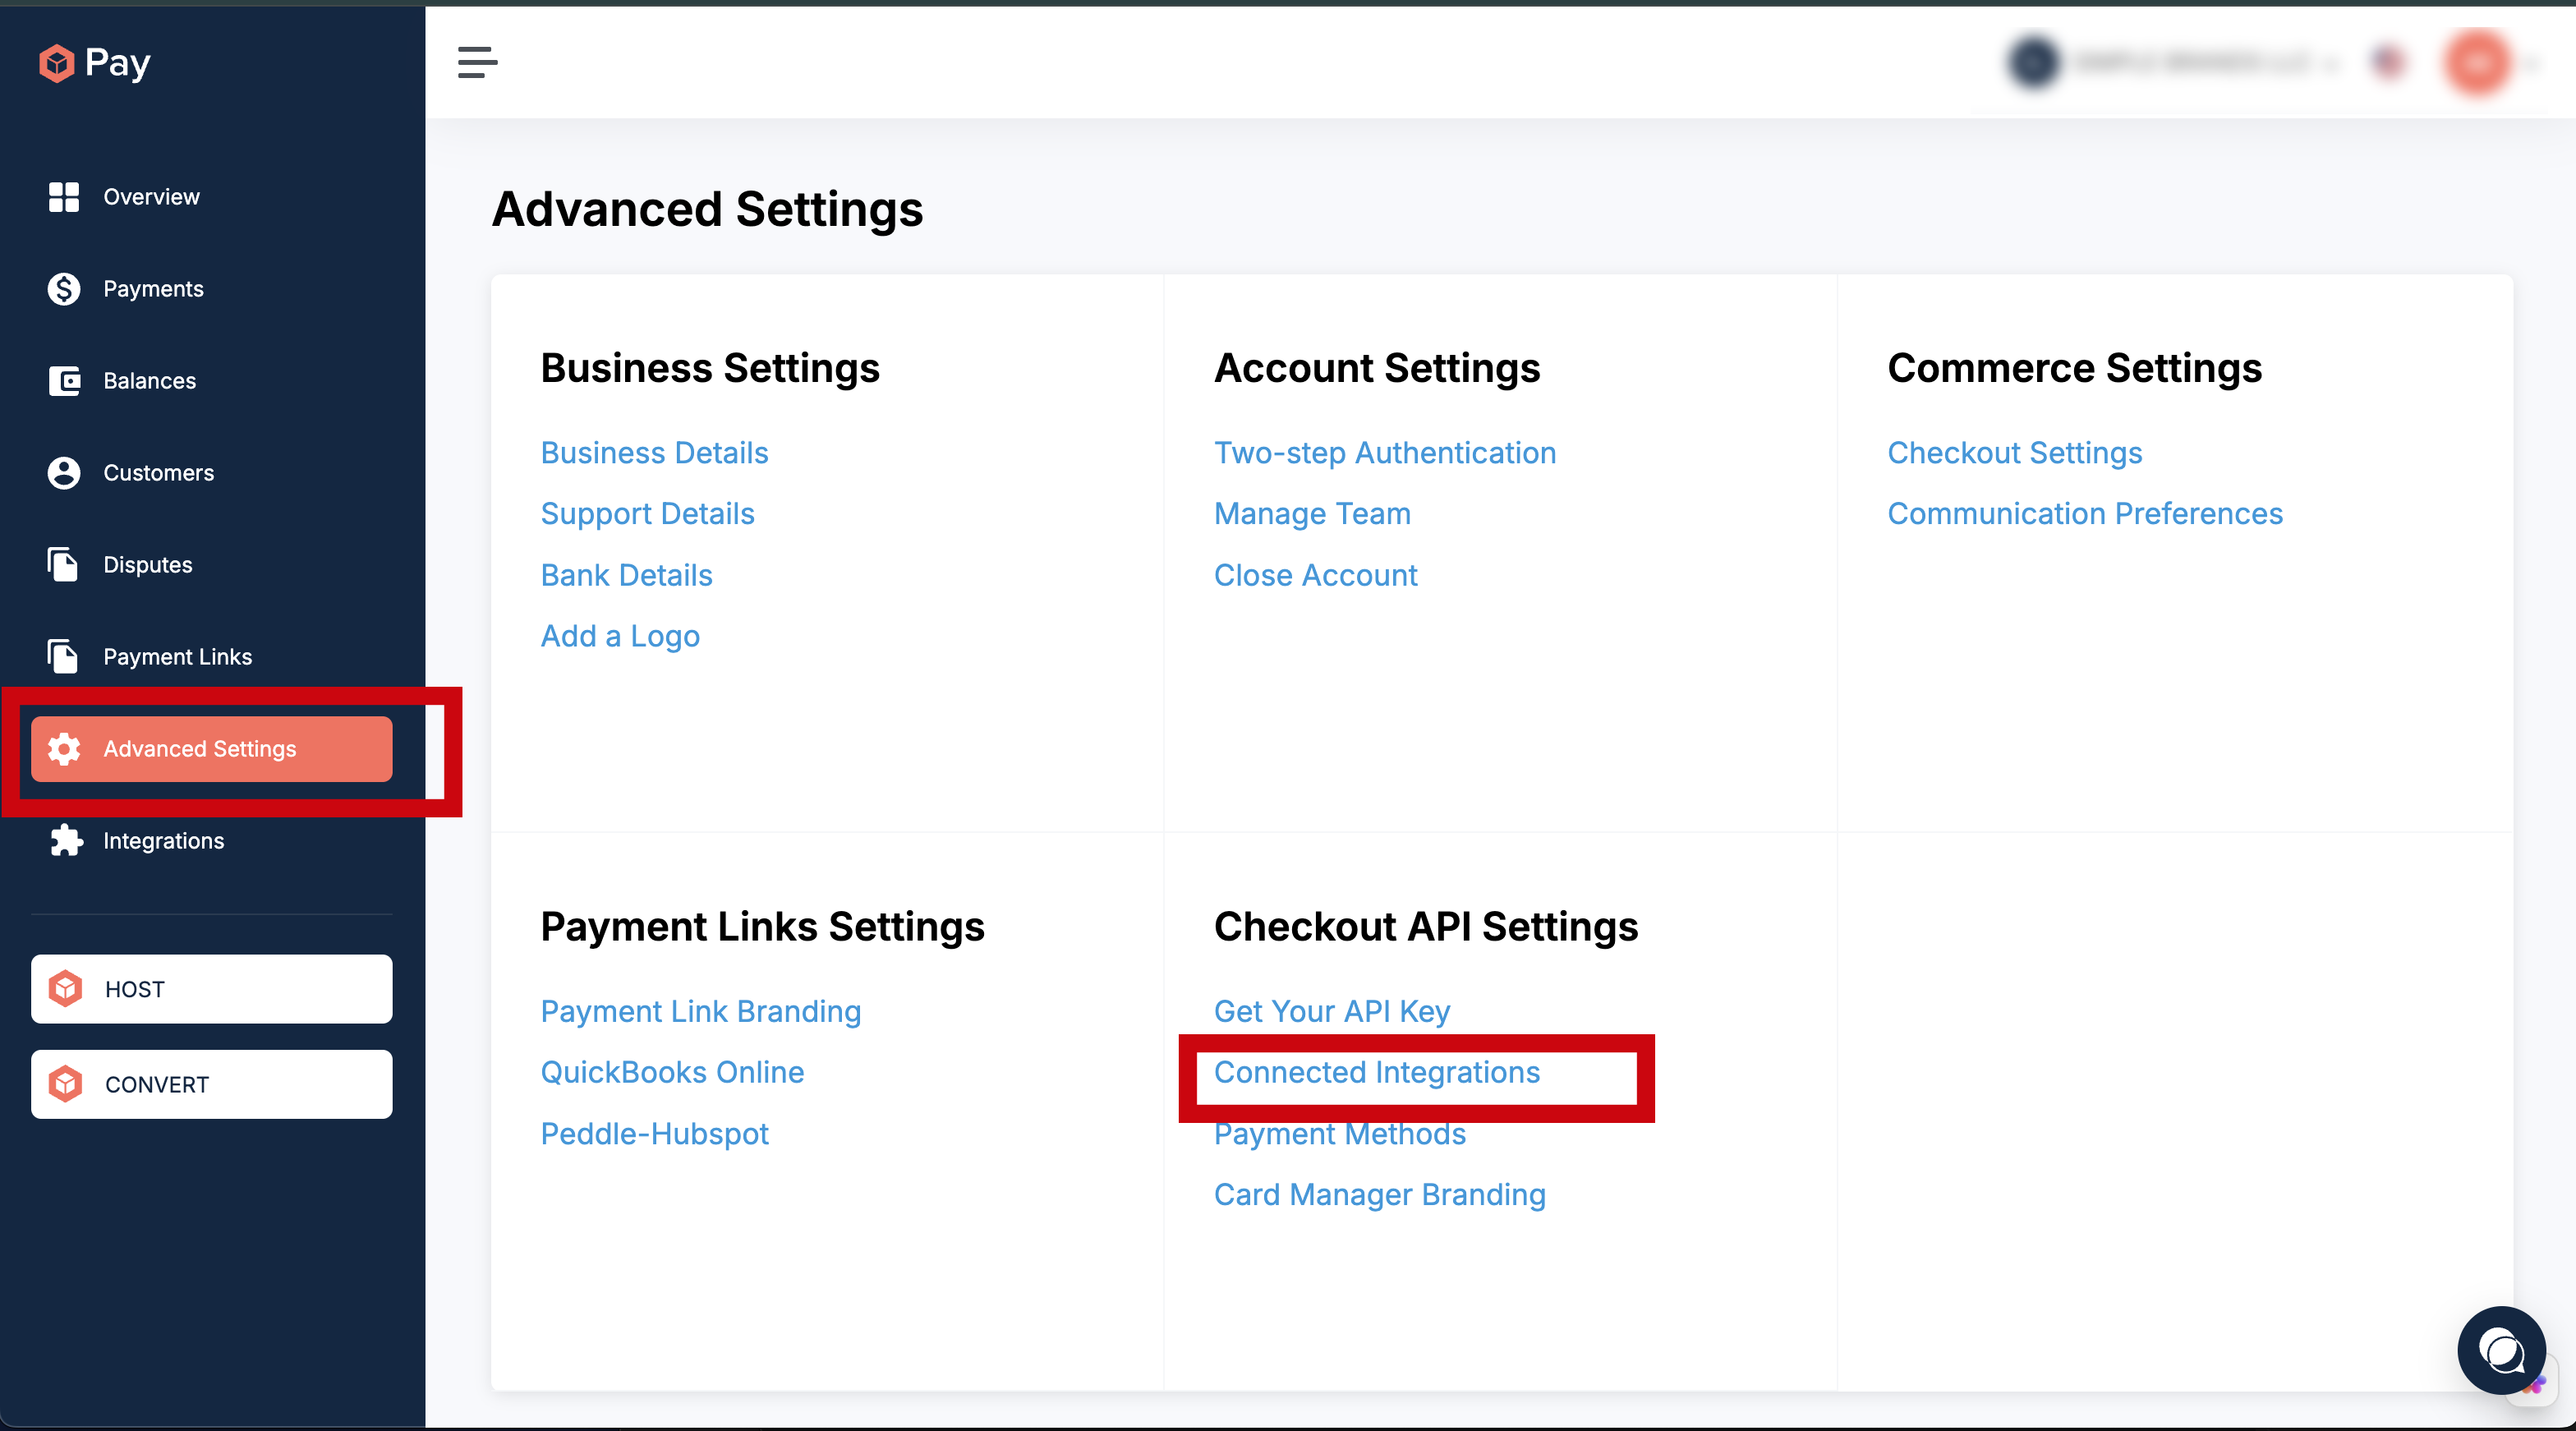
Step 1: Set Up a ConvesioPay Connected Integration
- In ConvesioPay, navigate to Advanced Settings and select Connected Integrations.

Click Create New Integration in the top right corner of the screen. Enter a name for your integration and make a note of it. This name will be required when connecting to CheckoutChamp or Konnective.
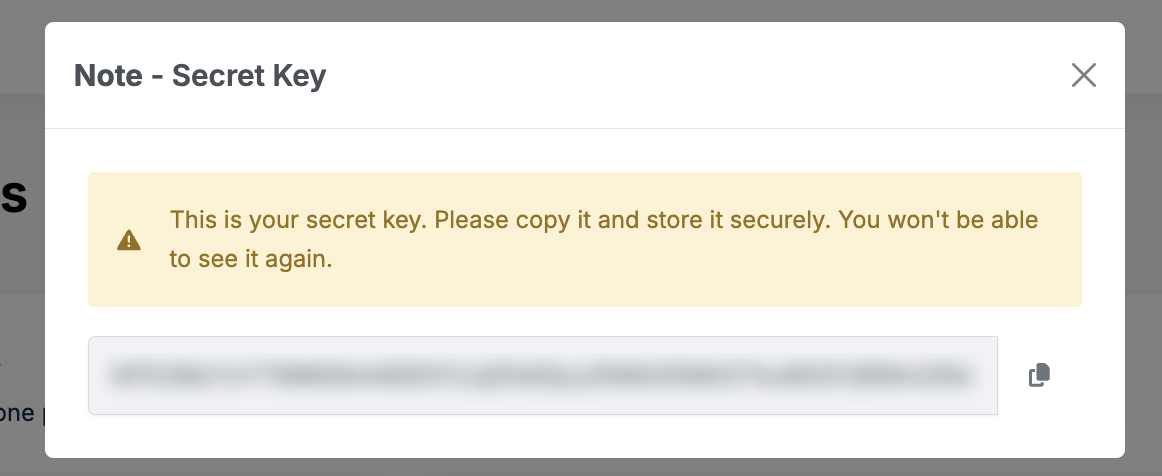
After clicking Create & Generate Key, a popup will display your secret key. Important: Save a copy of this key, as it will not be shown again.
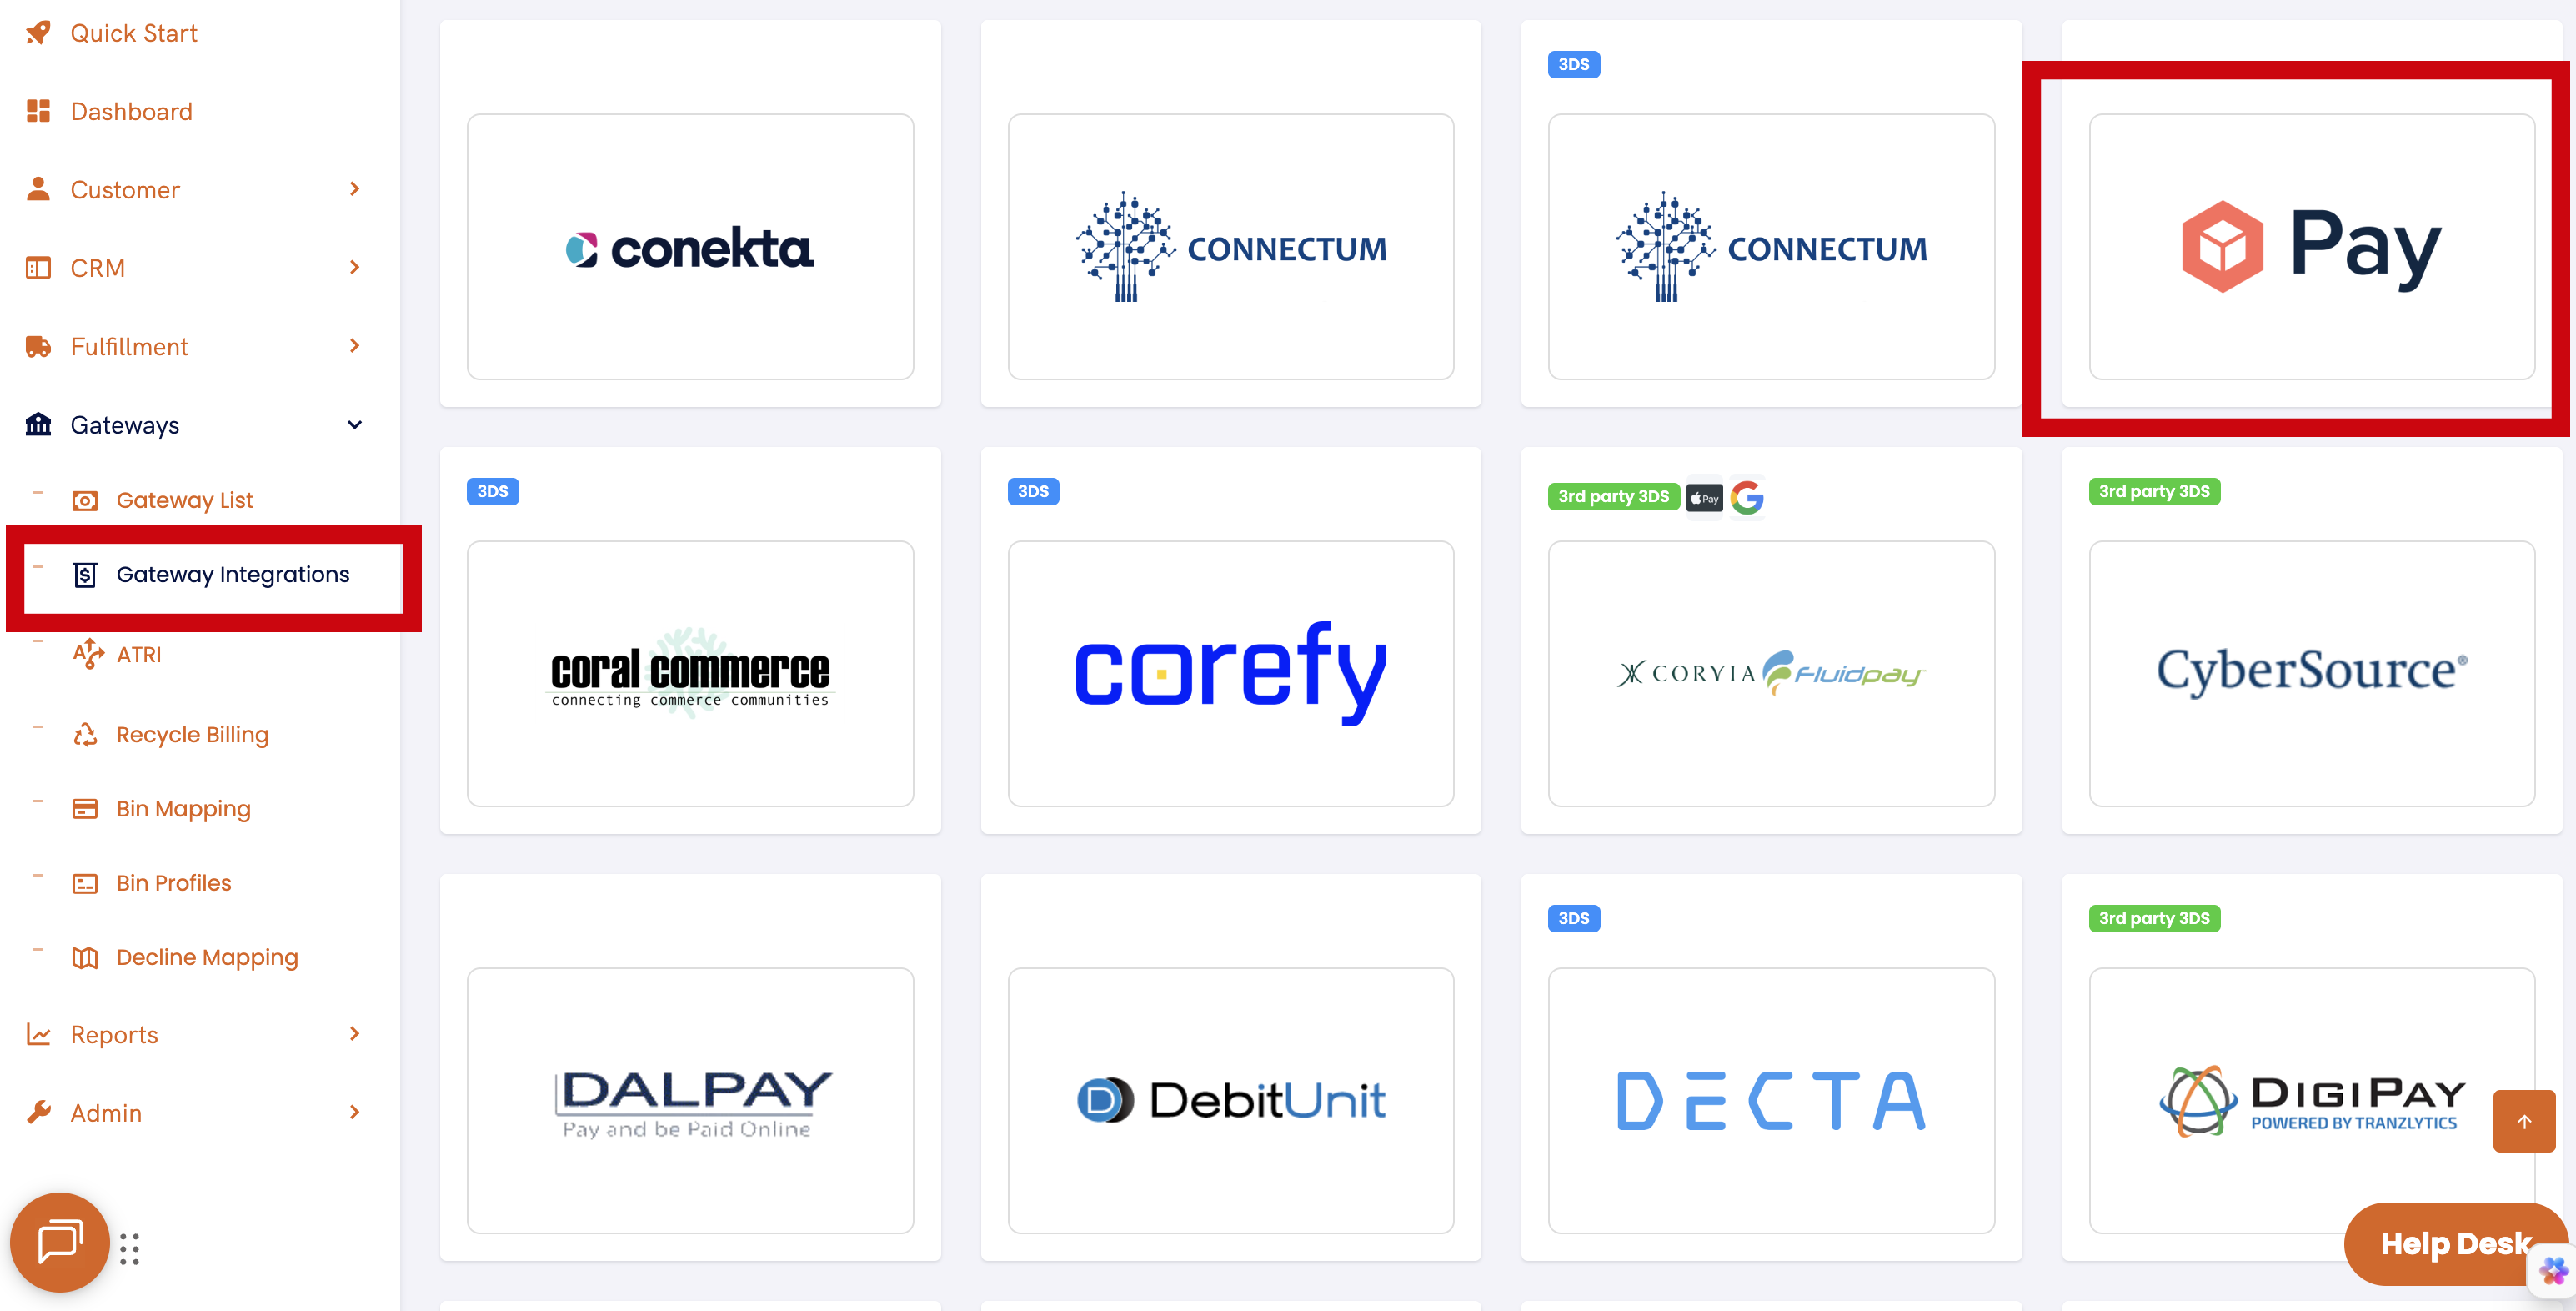
Step 2: Connect ConvesioPay to CheckoutChamp/Konnective
- In CheckoutChamp or Konnective, select Gateway Integration from the left sidebar.
- Choose the ConvesioPay icon from the list and click Activate.
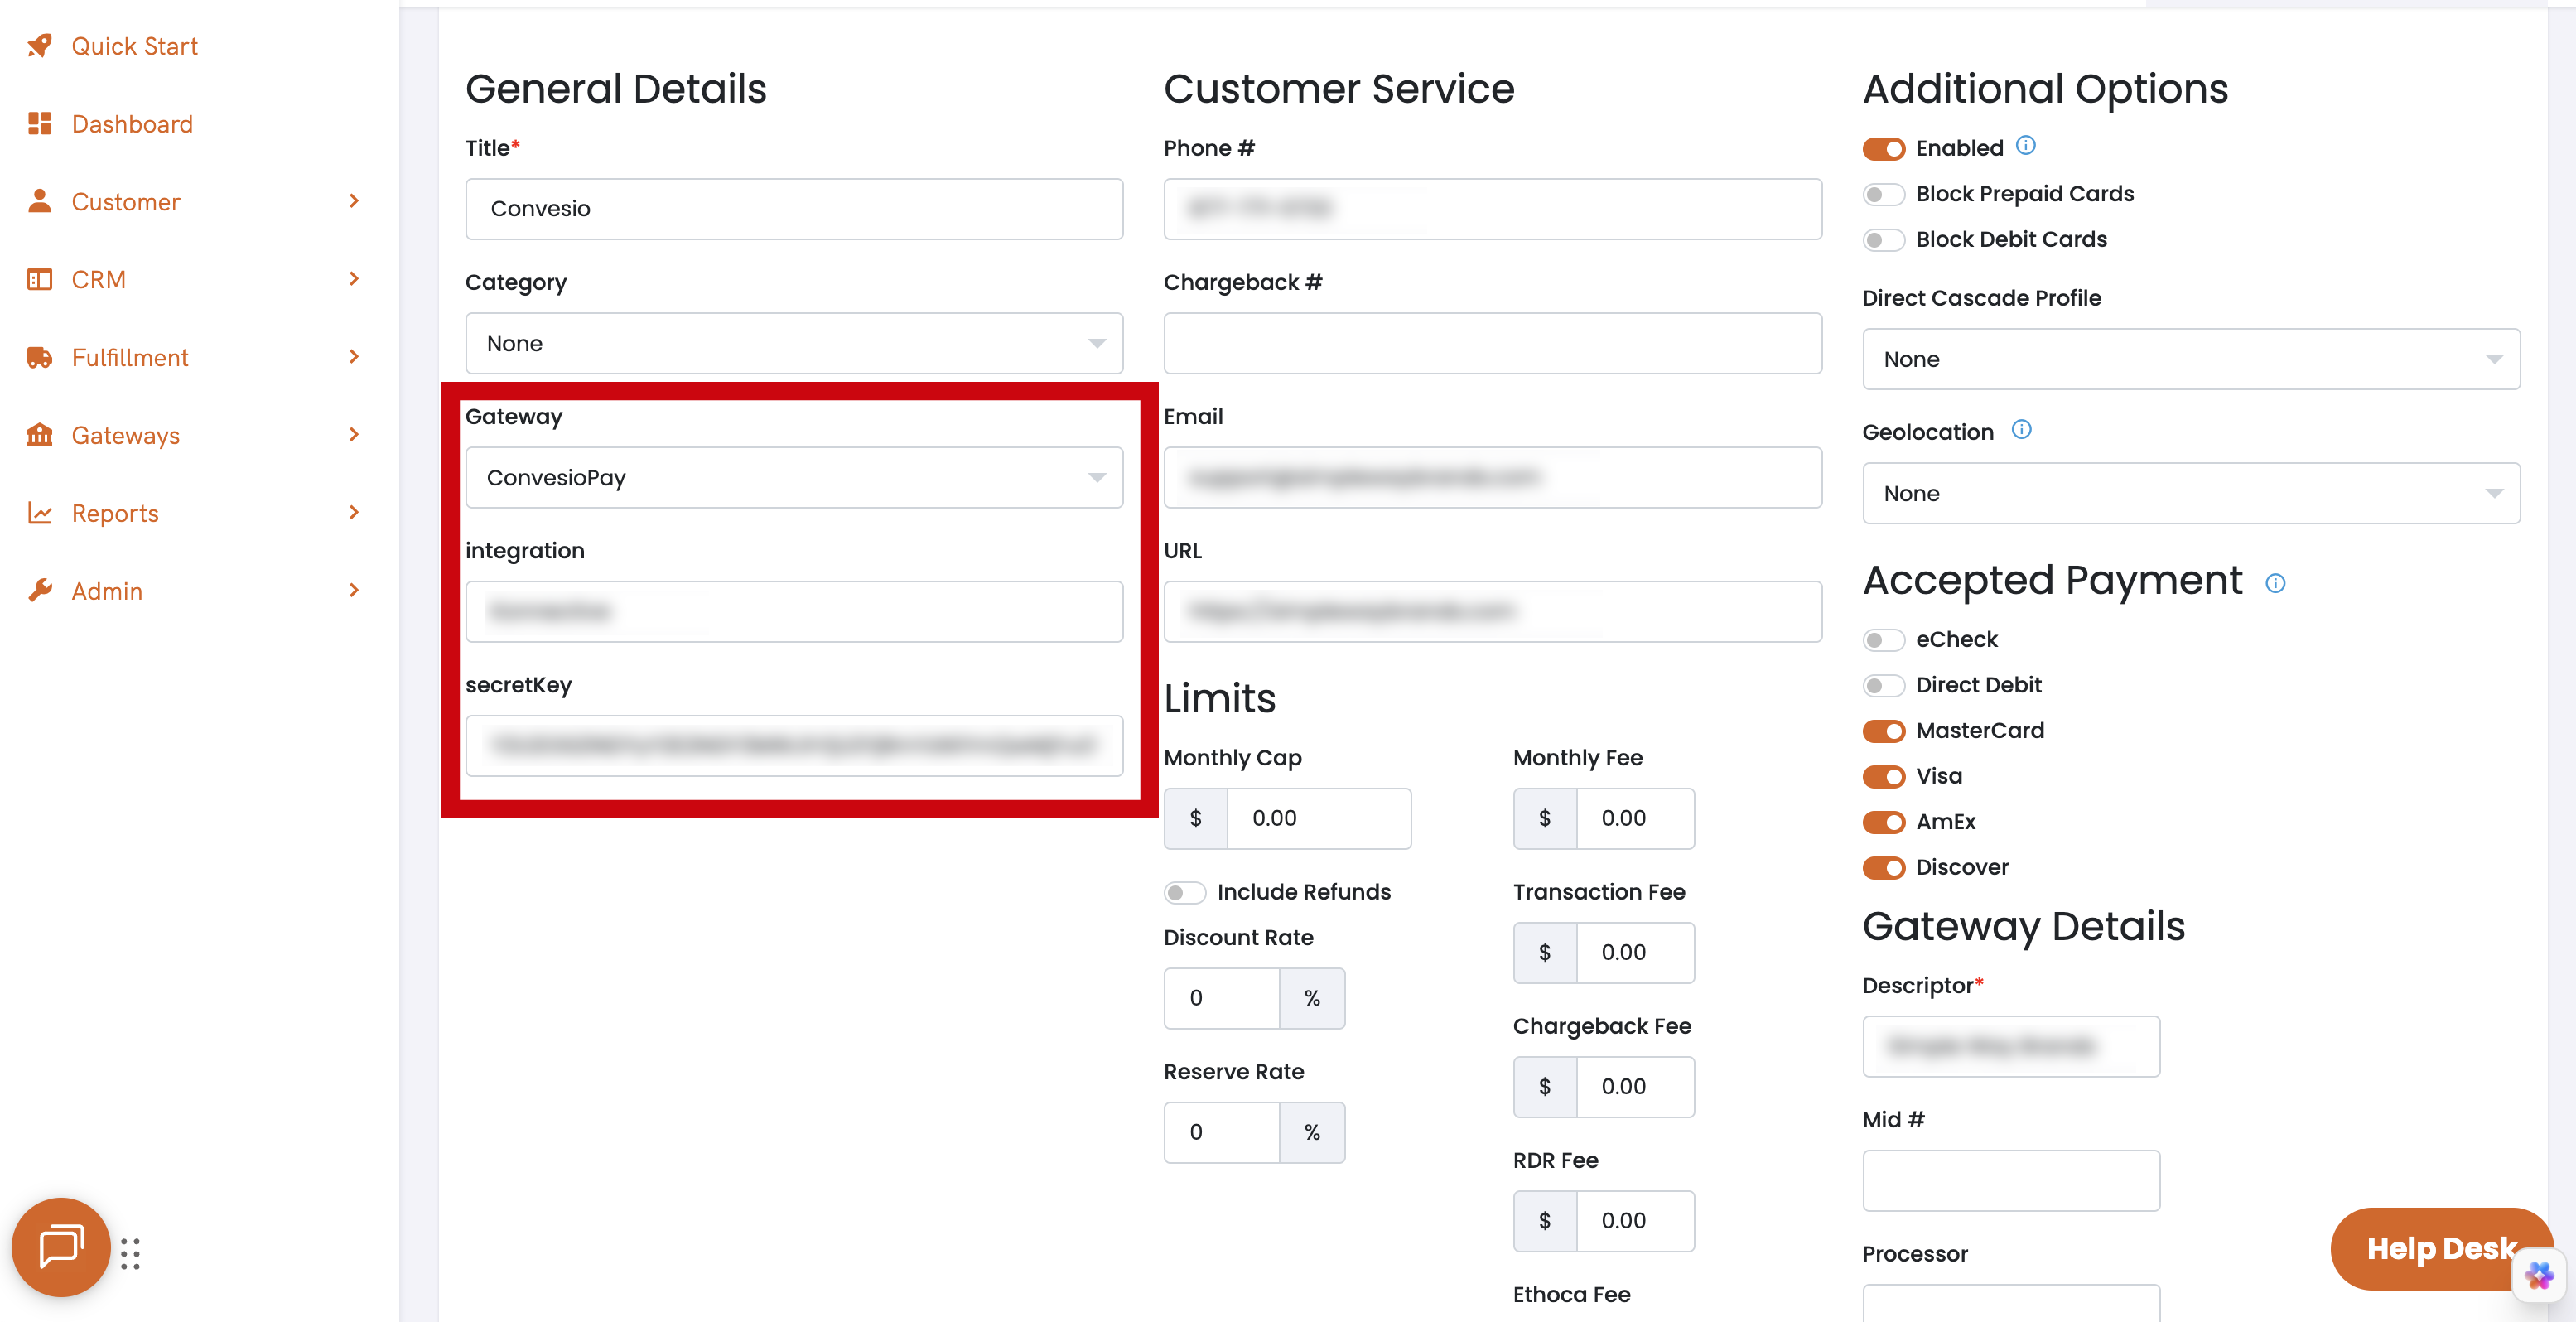
In the Gateway settings, ensure ConvesioPay is selected. Enter the Integration Name (from Step 1) into the Integration field, and the Secret Key into the secretKey field. Enable the gateway using the toggle in the top right.
Step 3: Test the Integration
Once setup is complete, you are ready to process a test transaction to confirm that the integration is working correctly.
Conclusion
You have successfully integrated CheckoutChamp/Konnective with ConvesioPay. If you encounter any issues or have questions, please consult the support documentation or contact customer support for assistance.