Google Pay lets your customers pay in seconds using a card saved in their Google Account — no manual entry, no friction. Once enabled, a Google Pay button appears automatically at checkout for eligible customers.
What you’ll need
- An active ConvesioPay account with the Orchestration Layer enabled — Google Pay is available only on accounts where the OL has been activated (contact support if unsure)
- Your store running on HTTPS
- A supported checkout integration: PeachPay, WooCommerce, or another ConvesioPay-connected platform
What this integration supports
With Google Pay enabled through ConvesioPay, your customers can:
- Complete checkout with a single tap using any card saved in their Google Account
- Pay on Google Chrome for Android and Google Chrome on desktop
- Use Visa, Mastercard, Amex, or Discover cards stored in Google Pay
Google Pay does not appear in Safari, Firefox, or non-Chrome browsers — this is a Google platform requirement, not a ConvesioPay limitation.
How the Orchestration Layer fits in
ConvesioPay’s Orchestration Layer (OL) is the routing engine behind your payments. When a customer pays with Google Pay, the OL automatically routes the transaction through the best available processor — optimizing for approval rates, with automatic failover if a processor is unavailable.
Google Pay must be enabled globally on your account before it can be toggled per-integration. This is handled by Convesio when your Orchestration Layer is activated. Once enabled at the account level, you can turn Google Pay on or off for each individual integration.
For a full overview, see [Payment Orchestration with ConvesioPay].
Step 1: Confirm Google Pay is enabled on your account
Google Pay is enabled globally as part of your Orchestration Layer setup. To verify:
- Log in to your ConvesioPay dashboard at convesiopay.com.
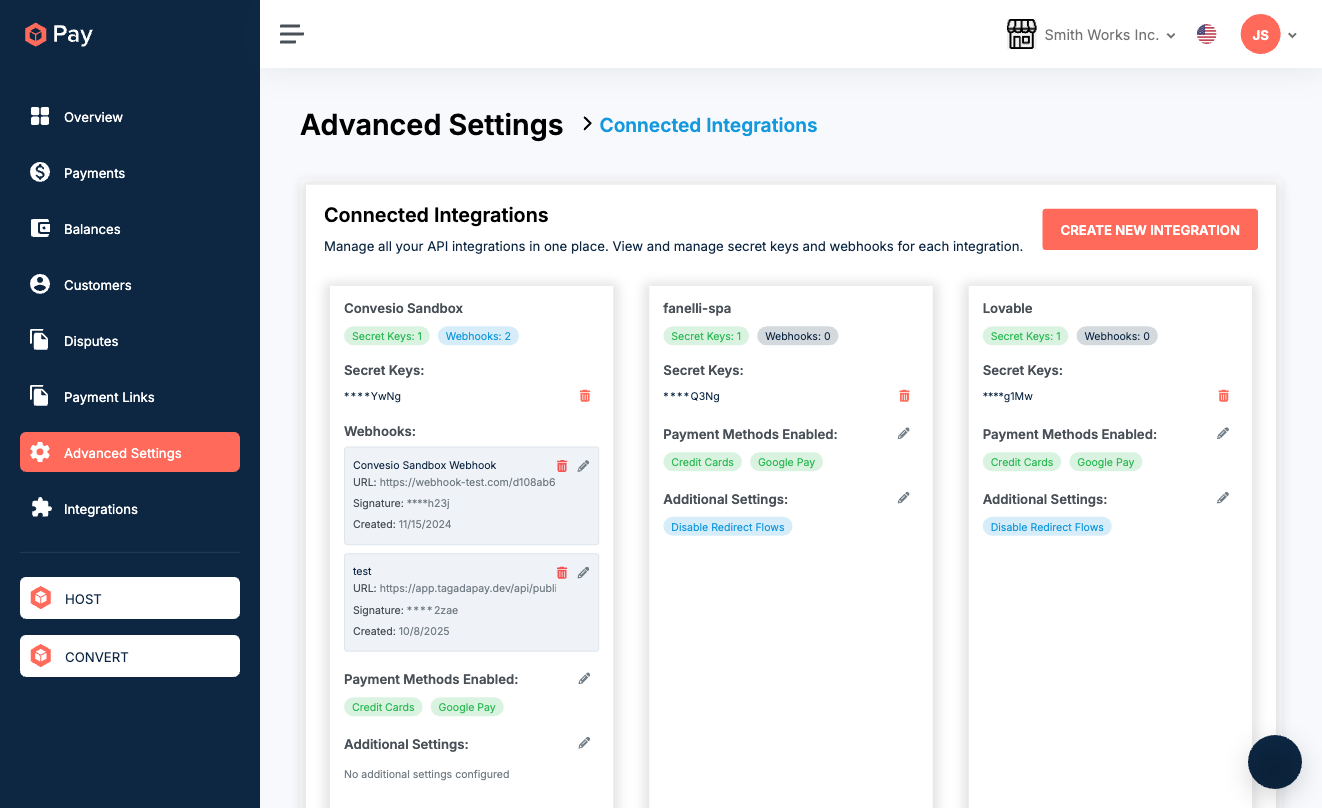
- Go to Advanced Settings → Connected Integrations.
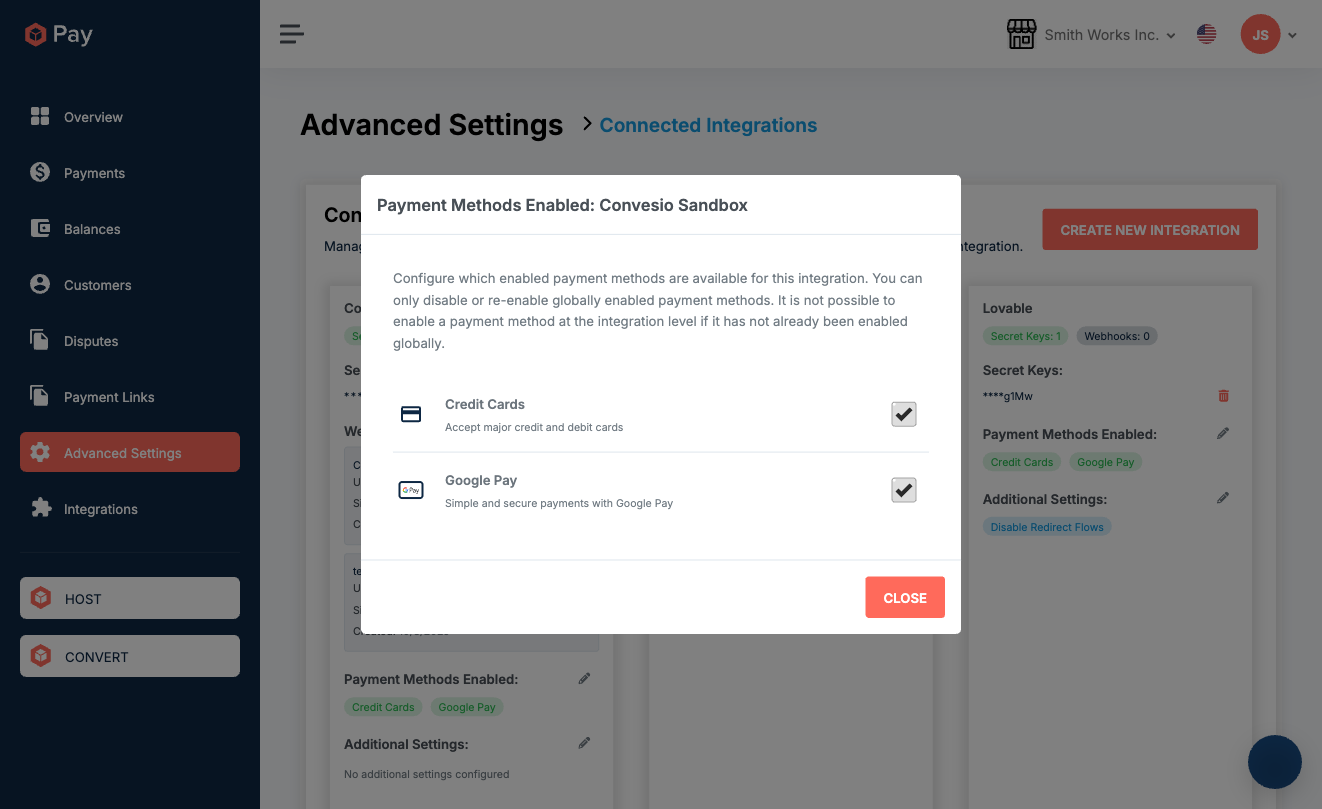
- Find your integration and click the pencil icon next to Payment Methods Enabled.
- Confirm Google Pay appears in the modal and is toggled on.
If Google Pay does not appear in this modal, your account’s Orchestration Layer may not yet be activated. Contact support to enable it.
Step 2: Toggle Google Pay for your integration
Each Connected Integration can have Google Pay enabled or disabled independently:
- Go to Advanced Settings → Connected Integrations.
- Find the integration you want to enable Google Pay for.
- Click the pencil icon next to Payment Methods Enabled.
- Toggle Google Pay on.
- Close the modal — changes save automatically.
Note: You can only enable payment methods that have already been enabled globally. If Google Pay is not shown in the modal, contact support.
Step 3: Verify Google Pay at checkout
If using WooCommerce with PeachPay:
Google Pay appears automatically as a separate payment gateway once enabled at the account level. To confirm:
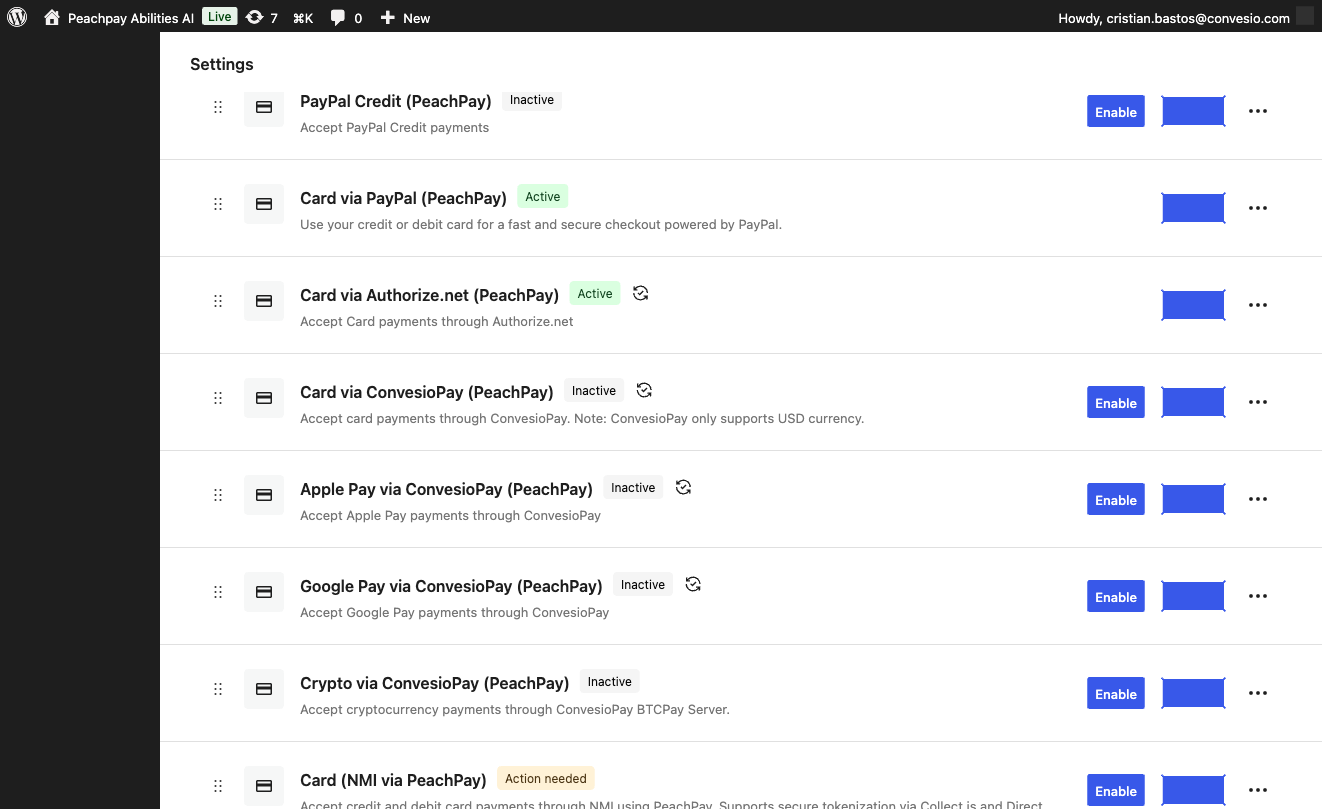
- In WordPress admin, go to WooCommerce → Settings → Payments.
- Confirm Google Pay via ConvesioPay (PeachPay) is listed and set to Active.
- No additional PeachPay configuration is needed — it activates alongside ConvesioPay.
What customers will see
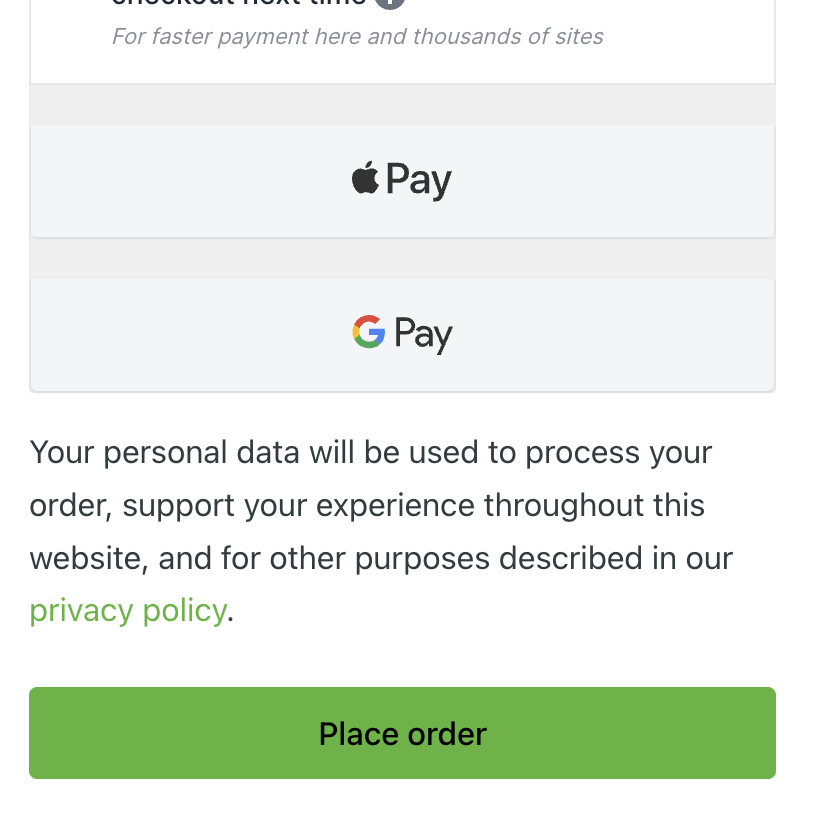
Once enabled, the Google Pay button appears at checkout for eligible customers — typically above the standard card entry form, alongside other express payment options like Apple Pay.
Customers on ineligible browsers (non-Chrome, or Chrome without a saved card) will not see the Google Pay button. The standard payment form remains available for all customers.
Testing checklist
- Open your store on Google Chrome for Android or Chrome desktop with a card saved in Google Pay
- Add a product to your cart and proceed to checkout
- Confirm the Google Pay button appears at checkout
- Tap the button — confirm the Google Pay payment sheet opens with your saved cards
- Complete a test purchase
- Confirm the order confirmation page loads successfully
- Check ConvesioPay → Payments to confirm the transaction appears with the correct amount and status
Troubleshooting
Google Pay button doesn’t appear at checkout
- Confirm Google Pay is toggled on in Advanced Settings → Connected Integrations → Payment Methods Enabled
- Test on Chrome for Android or Chrome desktop — Google Pay will not show in other browsers
- Confirm your store URL starts with
https:// - In WooCommerce, confirm “Google Pay via ConvesioPay (PeachPay)” shows as Active in WooCommerce → Settings → Payments
Google Pay appears but payment fails
- Check ConvesioPay’s transaction log for a specific error or decline reason
- Confirm your ConvesioPay account is active and in good standing
- Try a different card saved in Google Pay
Google Pay is not available in the Payment Methods modal
- Your account’s Orchestration Layer may not be activated — contact Convesio support
How to disable Google Pay
- Go to Advanced Settings → Connected Integrations.
- Find your integration and click the pencil icon next to Payment Methods Enabled.
- Toggle Google Pay off.
- Close the modal.
In WooCommerce, “Google Pay via ConvesioPay (PeachPay)” will stop appearing at checkout automatically.