Accept credit and debit card payments through NMI (Network Merchants Inc.) via PeachPay on your WooCommerce store. NMI supports secure tokenization via Collect.js and Direct Post processing.
Before you start
You will need:
- A ConvesioPay account with PeachPay installed and active on your WordPress site
- A WooCommerce store
- Your NMI credentials from your NMI merchant account:
- NMI Gateway Domain — your NMI gateway subdomain (e.g.
yourstore.transactiongateway.com) - Private Key (Security Key) — your NMI server-side API key; must have “API” permission enabled
- Public Tokenization Key — your NMI Collect.js public key (required for Collect.js integration method)
- NMI Gateway Domain — your NMI gateway subdomain (e.g.
Step 1: Open the NMI settings in WooCommerce
- In your WordPress admin, go to WooCommerce → Settings → Payments.
- Scroll down to find Credit card (NMI) — it shows an Action needed badge until credentials are entered.
- Click Manage.
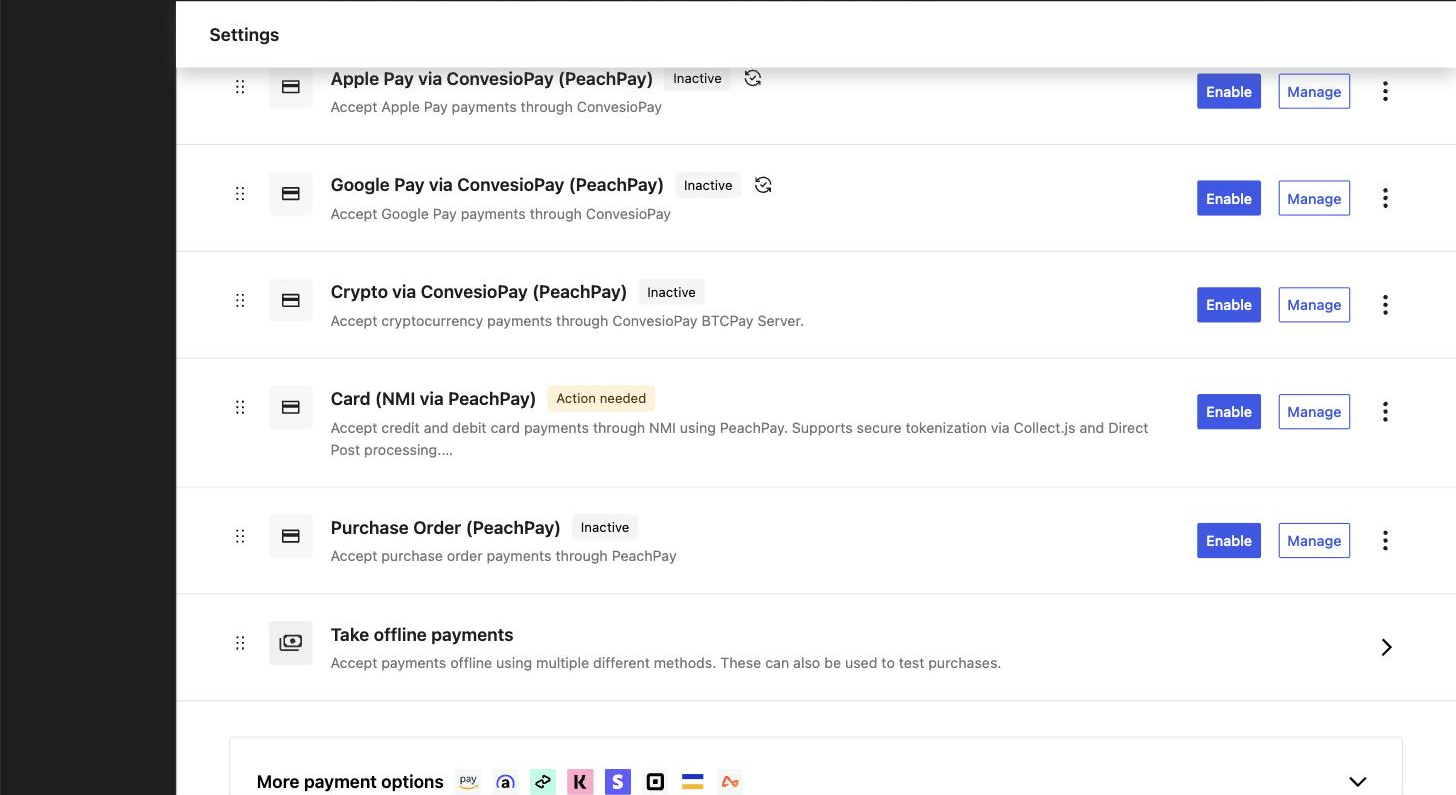
This opens the NMI gateway settings page inside PeachPay → Settings → Payments → NMI.
Step 2: Enter your NMI credentials
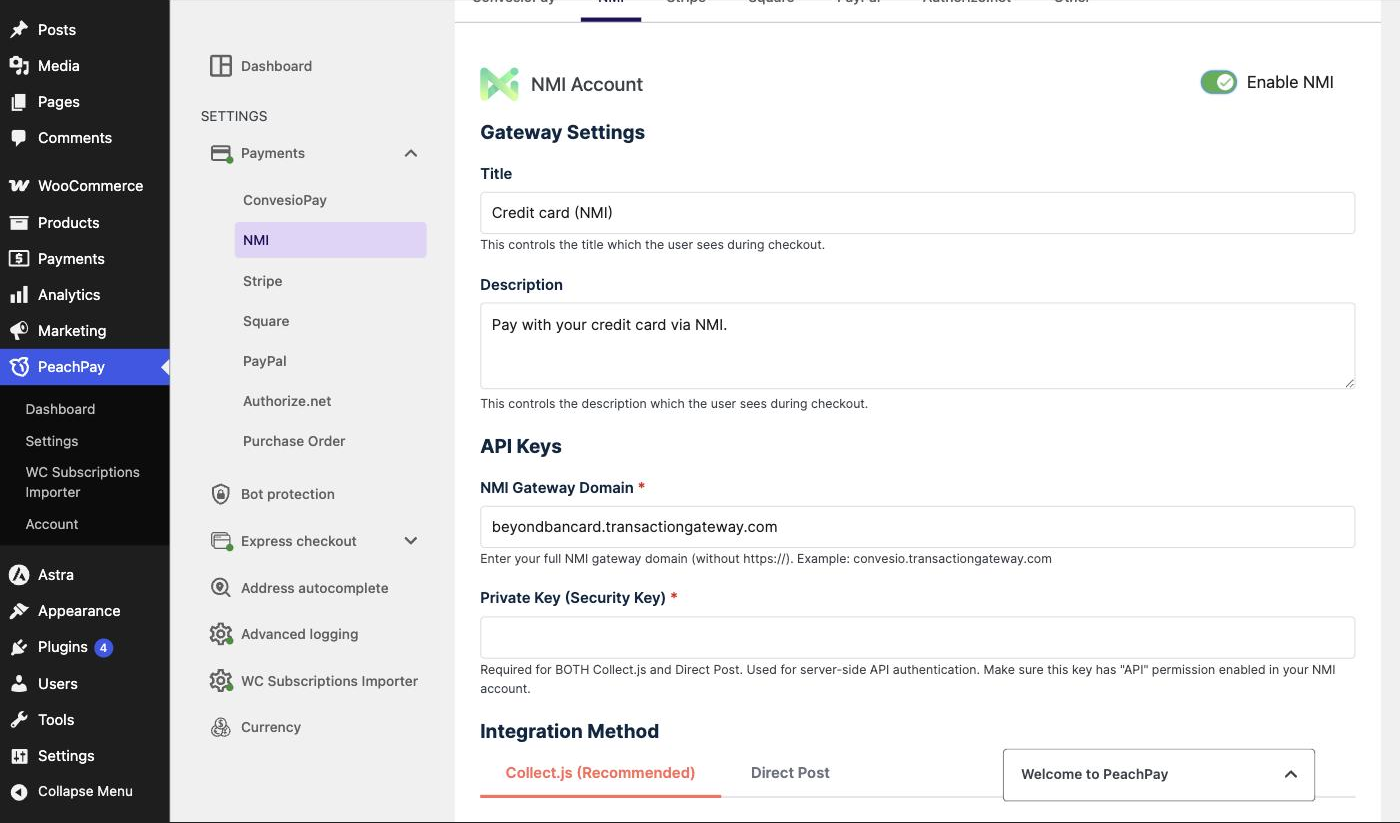
- Toggle Enable NMI to on.
- Scroll to the API Keys section and enter your credentials:
- NMI Gateway Domain — enter your full NMI gateway domain without
https://(e.g.convesio.transactiongateway.com) - Private Key (Security Key) — your NMI server-side key; required for both Collect.js and Direct Post
- NMI Gateway Domain — enter your full NMI gateway domain without
- Under Integration Method, select Collect.js (Recommended) — this enables PCI-compliant card tokenization in the browser.
- Enter your Public Tokenization Key (required for Collect.js)
- Use Direct Post only if instructed by your NMI account manager
- Click Save Settings.
Step 3: Confirm NMI is active at checkout
- Go back to WooCommerce → Settings → Payments.
- Confirm Credit card (NMI) now shows as Active (the “Action needed” badge is replaced by a green “Active” badge).
Step 4: Test a transaction
- Add a product to your cart and proceed to checkout.
- Select Credit card (NMI) as the payment method.
- Use an NMI test card if your account has sandbox mode enabled.
Sample test card (NMI test environment only):
- Card number:
4111 1111 1111 1111 - Expiry:
12/30 - CVV:
123
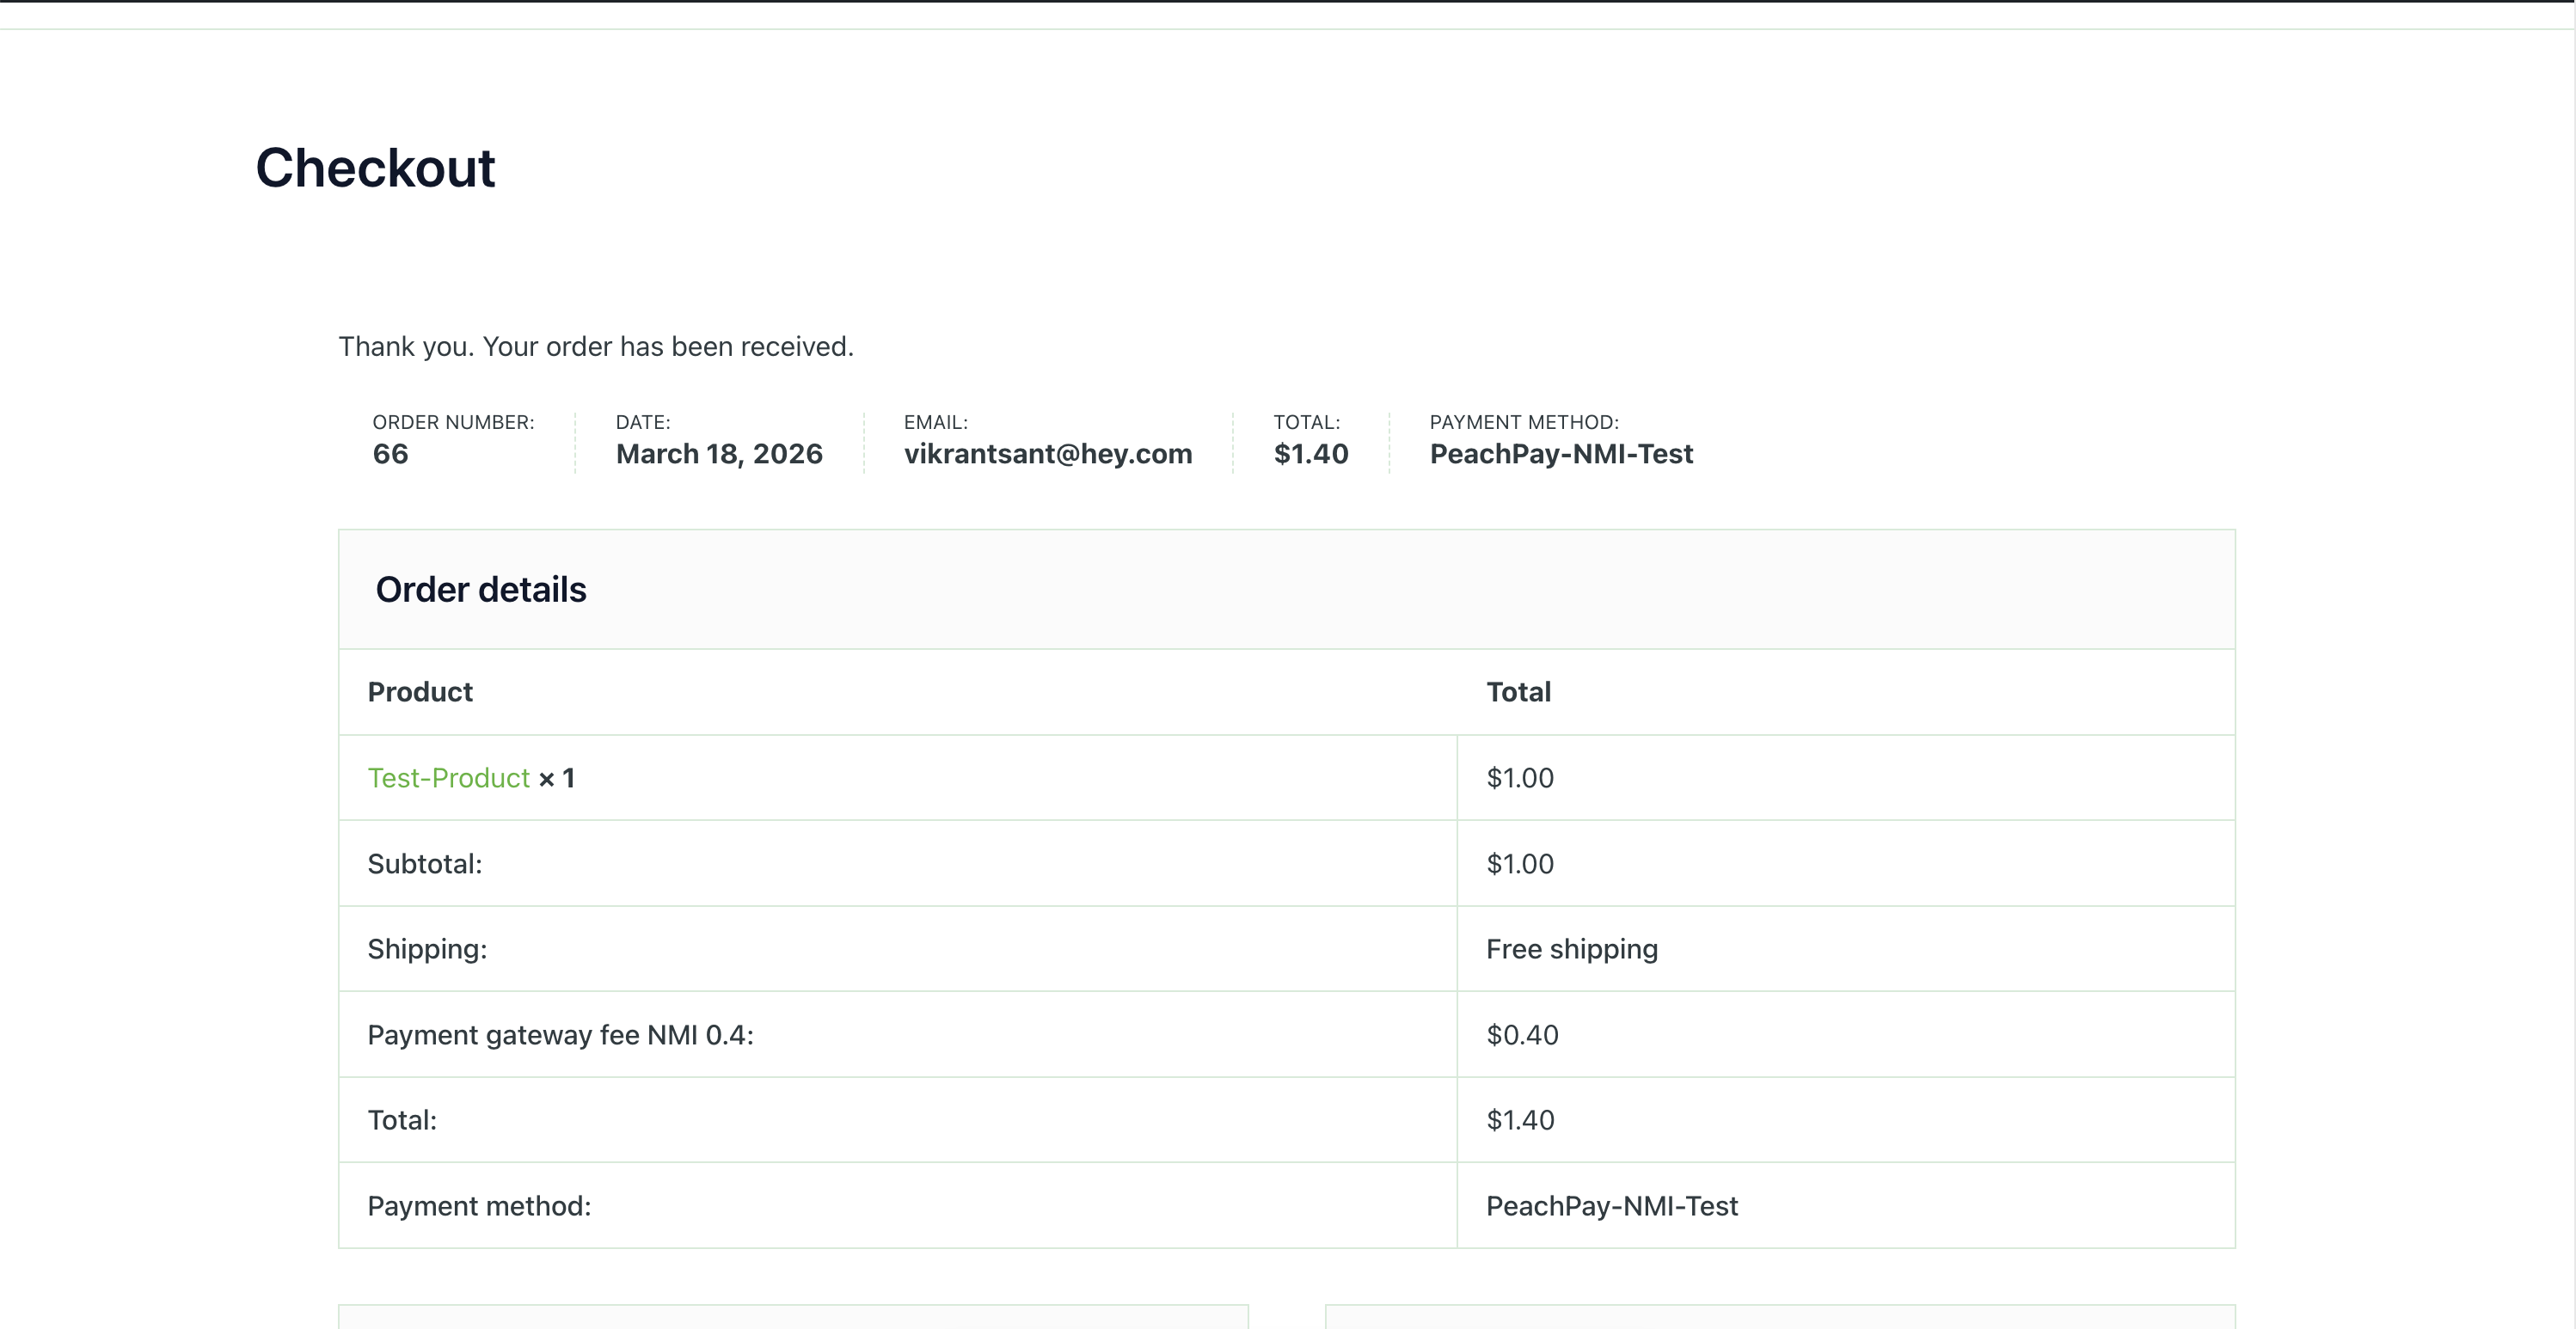
Confirm the following after payment:
- Checkout shows a payment confirmation
- Order is created in WooCommerce with status Processing or On Hold
- Transaction appears in your NMI merchant portal (your NMI gateway domain → Transaction Reports)
Test a refund
- In your NMI merchant portal, open the test transaction.
- Click Refund and choose full or partial amount.
- Confirm the refund status updates in the NMI portal and the WooCommerce order reflects the change.
Troubleshooting
“Credit card (NMI)” shows “Action needed” after saving credentials
- Double-check all three fields — NMI Gateway Domain, Private Key, and Public Tokenization Key — for extra spaces or line breaks
- Confirm the keys are from the correct NMI environment (test vs. live)
- Make sure the Enable NMI toggle is on before saving
NMI doesn’t appear in WooCommerce Payments
- Confirm PeachPay is installed and active on your WordPress site
- Refresh the WooCommerce Payments settings page
Payments fail at checkout
- Verify your NMI account is active and the keys match your environment (test vs. live)
- Ensure the Private Key has API permission enabled in your NMI account
- Check WooCommerce → Status → Logs for error details
- Confirm outbound requests from your server are not blocked by a firewall or security plugin
Order paid but status doesn’t update
- Check your WooCommerce error log: WooCommerce → Status → Logs
- Confirm outbound requests from your server are not blocked
How to disable NMI
- Go to PeachPay → Settings → Payments → NMI.
- Toggle Enable NMI to off and click Save Settings.